This is a sponsored conversation written by me on behalf of Cricut. The opinions and text are all mine.
Cricut Maker is the ultimate easy personalization tool for all things back to school this fall. With kids back to school, it’s the perfect time to personalize their items they’ll be taking with them to school. Personalizing items not only can be fun, but it helps items from getting lost in the shuffle.
This post contains affiliate links.
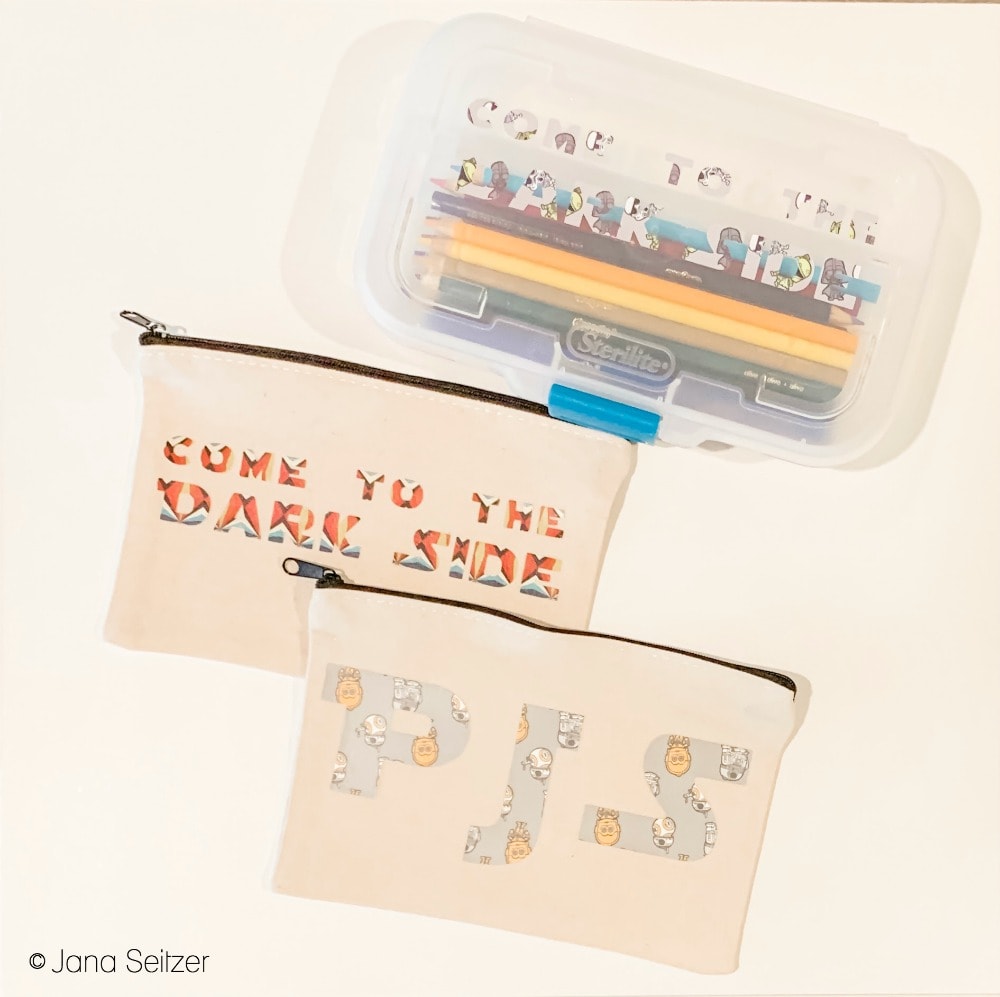
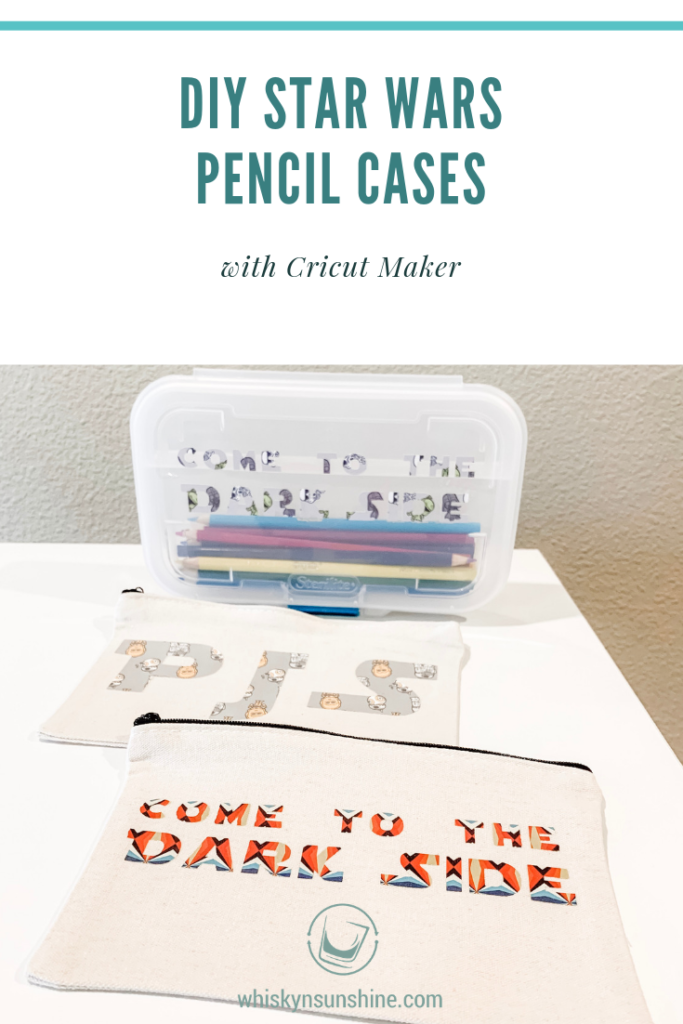
Pencil cases are a perfect item to personalize because every child in a classroom has one. These DIY Pencil Cases are made with the new Cricut Star Wars-themed iron-on. One has initials and one has a fun Star Wars-themed saying on it. We also made a cute hard case with vinyl on it.

DIY Pencil Case (zippered pouch)
Supplies
- Cricut Patterned Iron-On
- Cricut Cutting Mat
- Cricut Maker
- Cricut EasyPress 2
- Cricut EasyPress Mat
- Weeder
- Scissors
- Zipper pencil pouches
Directions
- Create your art file in Cricut Design Space. The initials file and “Come to the Dark Side” art files I created are available for download.
- Apply your Cricut Patterned Iron-On to the Cricut Cutting Mat. Load the mat into the Cricut Maker.
- Follow the directions in the Cricut Design Space to cut the file. (Make note to mirror the image because it’s an iron-on.)
- Remove negative Cricut iron-on pieces, leaving only the desired cut image on the liner (this process is known as weeding). Using the weeder (found in the Cricut Tool Kit can make this process faster and less tedious). Personally, I love the Cricut BrightPad to make this process even easier.
- Apply Cricut Patterned Iron-On following directions on the packaging using your Cricut EasyPress 2 Mat and Cricut EasyPress 2. (Note that each iron-on product varies a little in its instructions). The recommended settings for the EasyPress 2 can be found here.

DIY Pencil Case (hard plastic case with snap lid)
Supplies
- Cricut Premium Vinyl Sampler
- Cricut Cutting Mat
- Cricut Maker
- Weeder
- Scissors
- Plastic pencil case
- Cricut Transfer Tape
Directions
- Create your art file in Cricut Design Space. You can use the art I set up here.
- Apply your Cricut Vinyl to the Cricut Cutting Mat. Load the mat into the Cricut Maker.
- Follow the directions in the Cricut Design Space to cut the file.
- Remove negative Cricut vinyl pieces, leaving only the desired cut image on the liner (this process is known as weeding). Using the weeder (found in the Cricut Basic Tool Set can make this process faster and less tedious). Personally, I love the Cricut BrightPad to make this process even easier.
- Apply Cricut Vinyl following directions on the packaging with Cricut Transfer Tape.
- Gently place the Cricut Transfer Tape (adhesive side down) over your cut design, starting in the center and moving out toward the edges. Use the Scraper found in the Cricut Basic Tool Set to burnish (rub or polish) the Cricut Transfer Tape onto the vinyl. Peel the vinyl away from the liner at a 45-degree angle.
- To apply the vinyl decal to the pencil case, make sure your mug surface is clean and dry. Carefully place the Cricut Transfer Tape with vinyl decal onto the pencil case as you would like it to appear. Burnish the Cricut Transfer Tape onto the surface, starting in the center, moving out toward the edges. Use the Scraper tool to smooth.
- Peel the Cricut Transfer Tape away from the vinyl at a 45-degree angle. If the vinyl sticks to the Cricut Transfer Tape, simply burnish the Cricut Transfer Tape onto the vinyl with the scraper and peel away again.
- SEND HELP is a Campy, Wild, Dark Ride - January 29, 2026
- Mental Health Treatment Is Getting More Personal and That Is a Good Thing - January 29, 2026
- The New Language of Addiction Care, Where Design, Dignity, and Depth Matter - January 24, 2026


Leave a Reply