Thanks to Cricut for sponsoring this post. As always, all opinions are my own.
If you’ve never used a Cricut Explore Air, you might wonder, “Will it be easy for me to use the Cricut software to create Make it Now projects?” The short answer is, “Yes.” The pre-designed art files are so simple to use and there are hundreds to choose from. We love this s’mores art so we created a sign we can use for holiday decor or a DIY smores bar sign.
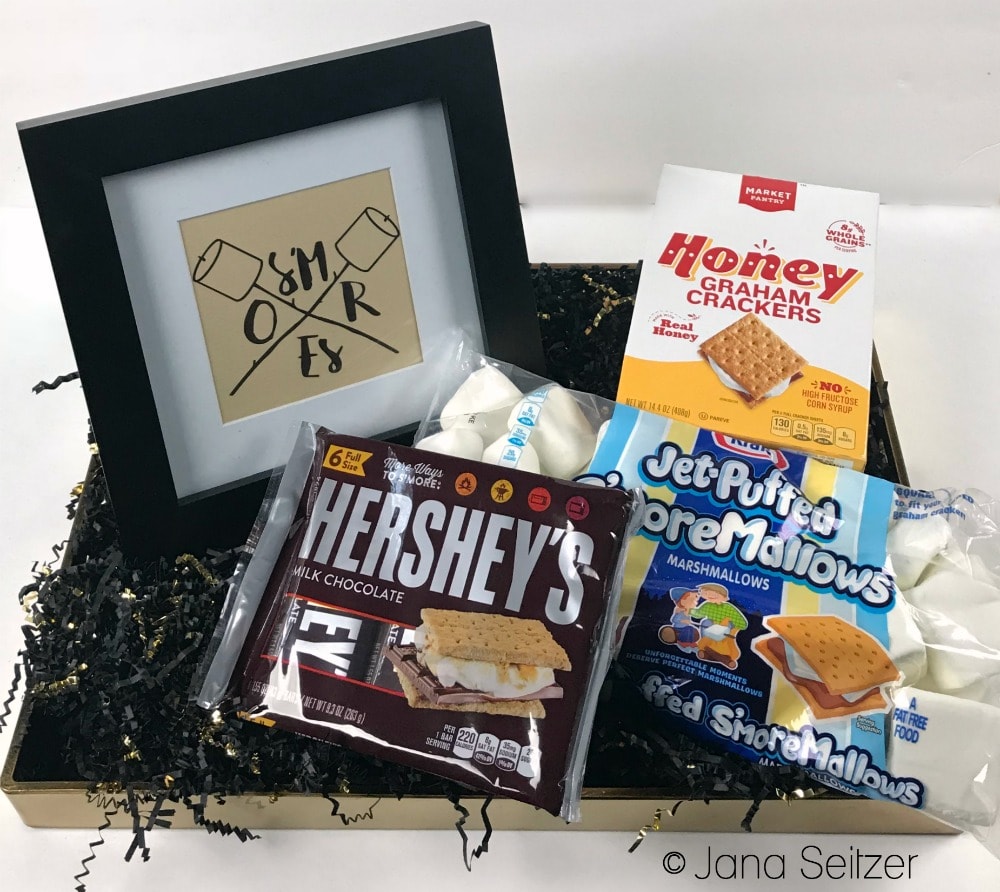
We’ve done a few DIY projects now on the blog with our Cricut Explore Air. It’s so easy to work with. Most of the time I can knock out a quick project in under an hour; sometimes in less than 30 minutes, depending on the project we choose. This sign was done in about 15 minutes because the art was already created for us. We love smores any time of year and we especially love a warm gooey smores during the holiday season. In the Pacific Northwest, it’s warm enough we can have a bonfire year-round. We created this fun holiday DIY Smores Bar sign with our Cricut Explore Air—perfect for your home or for a gift!

DIY Smores Bar Sign
Supplies:
- Cricut Vinyl Cocoa
- Cricut Cutting Mat
- Cricut Explore Air
- Weeder
- Scissors
- Transfer Tape
- Scraper
- Frame of your choice
- Paper of your choice
Directions:
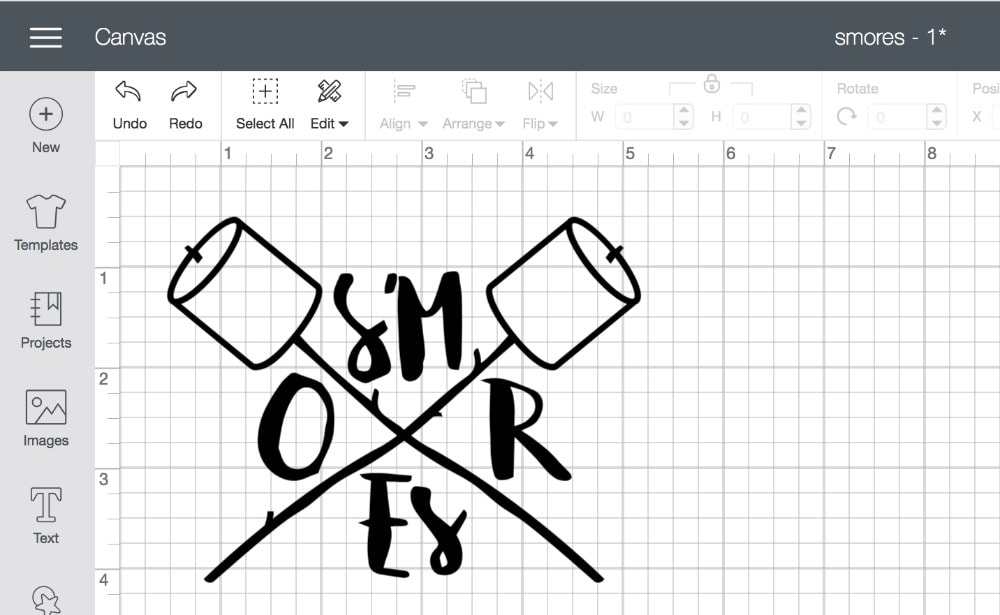
- Create your art file in Cricut Design Space. The DIY S’mores Bar Sign file I created is a public file and you can use it from here.

- Apply your vinyl to the Cricut Cutting Mat. Load the mat into the Cricut Explore Air.
- Follow the directions in the Cricut Design Space to cut the vinyl file.
- Remove negative Cricut vinyl pieces, leaving only the desired cut image on the liner (this process is known as weeding). Using the weeder (found in the Cricut Tool Kit can make this process faster and less tedious).
- Remove the transfer tape liner (cut to a little bit larger than your final art size).

- Gently place the transfer tape down on top of the image. To eliminate any bubbles, use a craft stick or the scraper, starting in the center and drawing outward toward the edges to burnish the transfer tape to the vinyl.
- Peel away the adhesive vinyl liner at a 45-degree angle. If the adhesive vinyl does not separate from the transfer tape liner, burnish the transfer tape onto the adhesive vinyl and peel away again.
- Make sure you have a flat, dry, clean work surface for your paper.
- Carefully position the transfer tape with the adhesive vinyl image onto the project surface for your paper how you would like it to appear.

- Burnish the transfer tape onto the project surface, starting in the center and gently moving outward, again using the scraper or a craft stick.
- Peel away the transfer tape from the adhesive vinyl at a 45-degree angle. If the adhesive vinyl images stick to the transfer tape, burnish the transfer tape onto the vinyl and peel away again.
- Put the finished paper in the frame.


Enter below for a chance to win:
Check out some of our other Cricut projects
DIY Tangled Lantern
DIY Mermaid Hair, Don’t Care T-shirt
DIY Talk Less, Smile More Shirt

This is a sponsored conversation written by me on behalf of Cricut. The opinions and text are all mine.
- SEND HELP is a Campy, Wild, Dark Ride - January 29, 2026
- Mental Health Treatment Is Getting More Personal and That Is a Good Thing - January 29, 2026
- The New Language of Addiction Care, Where Design, Dignity, and Depth Matter - January 24, 2026


[…] DIY Smores Bar Sign with Cricut […]